

As I mentioned earlier this week, I'll be sharing a DIY I did with my friend for her wedding. For her placecards, Yunyi wanted origami flowers. She sent me this inspiration picture originally.

After some diligent web research, I found this tutorial.
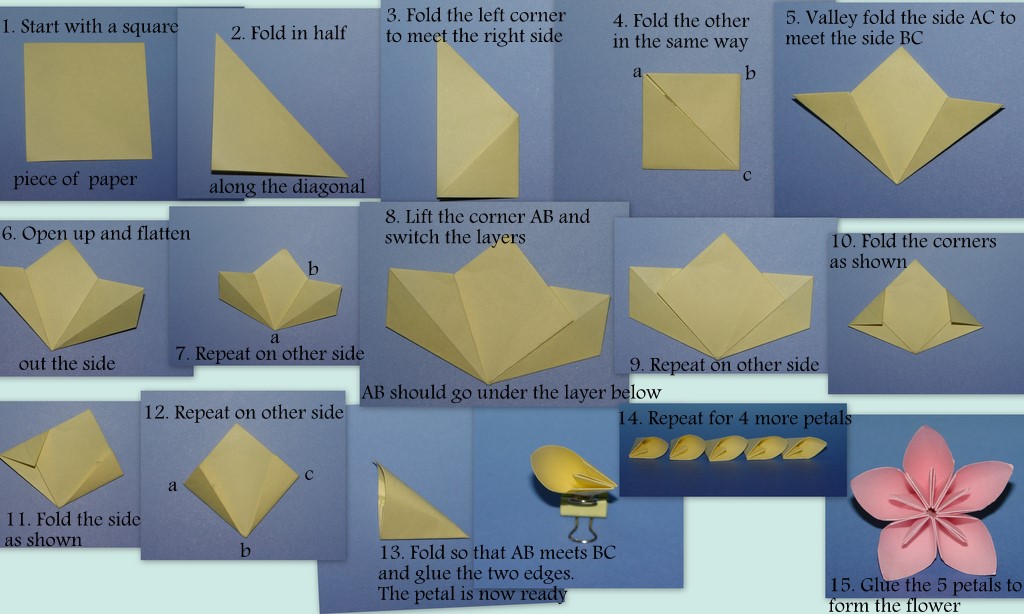 |
| [Source] |
 |
| [First try with post-its] |
Yunyi and Sung spent the evenings of the next couple of weeks folding the petals and assembling the flowers. To assemble, using regular white glue, put petals together. Hold it together while it dries with bobby pins! Then glue gun some bling in the center of the flower.
To hold up the name cards, Yunyi bought a paper punch that created a bridge-like shape on. the back petal.

To recap:
1) Cut paper for petals to size (3x3)
2) Fold paper into petals
3) Glue five petals together, holding them together with bobby pins while they dry
4) Bedazzle
5) Punch
6) Print out, cut, and add name cards

No comments:
Post a Comment